|
Photo 1: Whenever begining a Historical fire engine project, "start with research." Gather as many photos of similar engines as possible from books, the internet, newspaper photos etc. Once you have the designs drawn out on paper, perforate holes in the drawing using a pounce wheel. Transfer the drawing into place by rubbing a pounce bag (white powder or chalk wrapped in a piece of material) over the image. When you remove the piece of paper you will see small dots on the surface showing where to paint the glue. This works great when having to duplicate a design several times. For long lines, tape them off with blue or green Fine Line tape.
|
Photo 2: Using 1Shot's #4008 Quick Dry Gold Size mixed with a small portion of metallic gold powder for visibility, brush on the size (glue)between the pieces of tape on lines and inside the dots on designs. Make sure the size is brushed on smoothly and evenly with no heavy or sagging areas. Note: start applying the size on the bottom lines/designs and work your way upward. This avoids any particles of gold falling and adhering to sized areas not covered in gold yet. Also you can reduce the size slightly as needed using 1Shot's high temp reducer #6002. Make sure this part is done in a controlled environment, as dust and particles in the air will show in the gold.
|
Photo 3: Here it gets a little tricky. You want the size to dry enough to allow the gold to adhere, but not too much that the gold doesn't stick. The drying time can take anywhere from 45 minutes to a couple of hours, depending on the temp, humidity and environmental conditions. Test the sized area using the back of your knuckle, touch it very slightly and see if it's almost dry. You want it to have very little tack and not at all sticky. When it's time, it's time, don't take your time, work quick, remember if you don't go as fast putting on the gold as you did painting on the glue it will set up too much and make it hard for the gold to stick. Use 23k "patent" gold leaf. This leaf comes adhered to thin sheets of tissue and all you have to do is rub the gold onto the glued area.
|
|
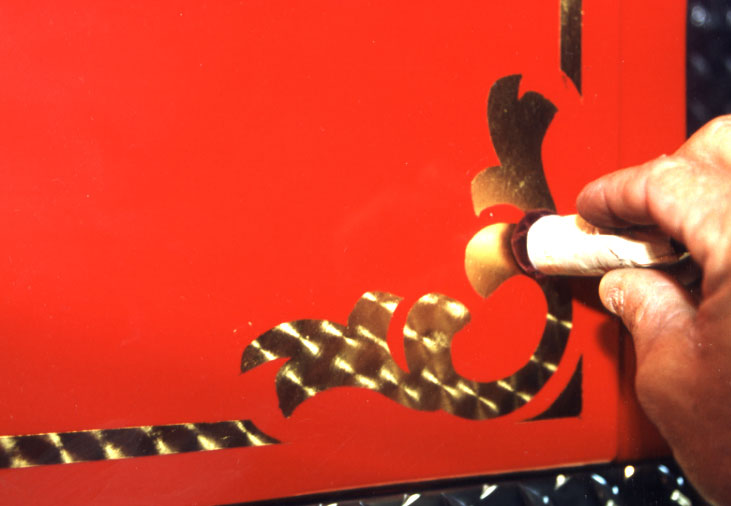
Photo 4: To remove the excess gold around the edges, simply rub your finger with very little pressure in small circles over the edges of the gold. If the engine turning effect is desired, this is done by placing a piece of cotton into a piece of velvet and taping it together at one end making it a spinner pad. Hold the spinner pad against the gold and rotate clockwise about a half a turn. This will put fine scratches into the gold, making light reflect 360 degrees in each circle spin. Note: overlap each circle spin into one another. On long lines, always keep the center of the circle spin in the middle and in line with each other in the gold leaf stripe. After this is done it's time to brush on the first coat of clear. For this I use 1Shot's #4006 Super Gloss Tinting Clear and let it dry overnight. Again this can be reduced using 1Shot's High Temp Reducer #6002.
|
Photo 5: For lettering and striping outlining the gold, you can use Fine Line tape placed 1/8-inch above and below the gold leaf stripe. simply paint the black up to the edge of the gold overlapping slightly and paint to the tape. Most times I freehand stripe all the black, but this will work good if you aren't skilled at freehand striping and outlining.
|
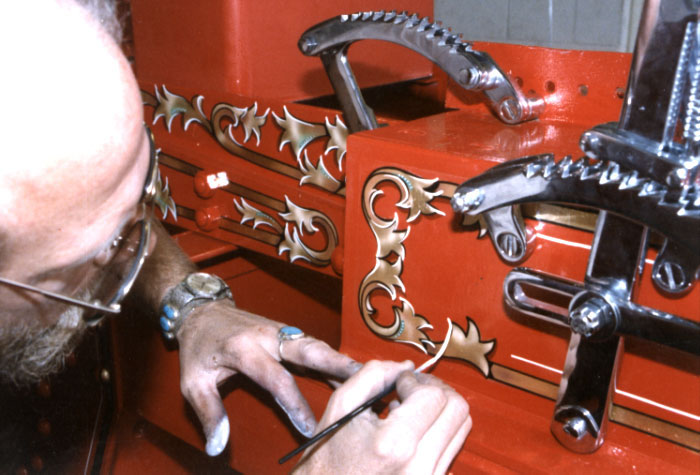
Photo 6: Quite often historical fire engines recieved super fancy design work. this was achieved by creating free flowing scroll designs interconnected with the striping. Each design got special treatments in detailing. You can add highlights, shadows and 3D effects to give the designs more style. Here I'm freehand painting the design detail using a outlining lettering quill brush.
|
|
Photo 7: Here you can see how to keep the outlining straight and consistent using Fine Line tape. All the Fire Engines in Burbank California bear my mark.
click here to see other completed Gold Leaf Fire Engine projects.
|
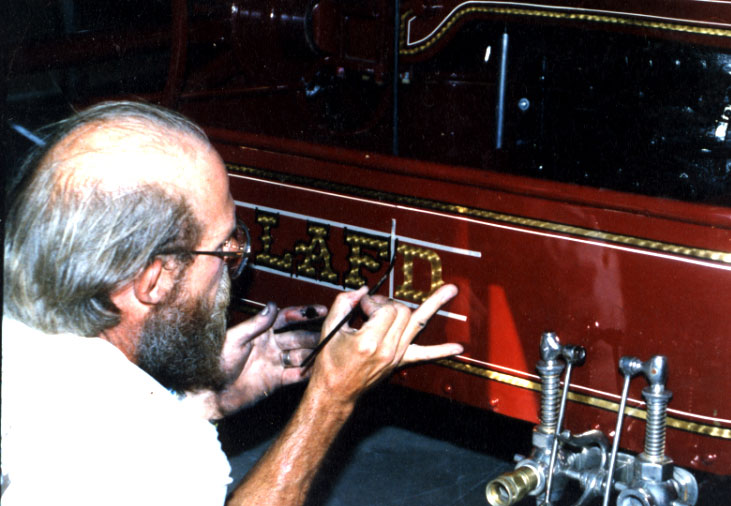
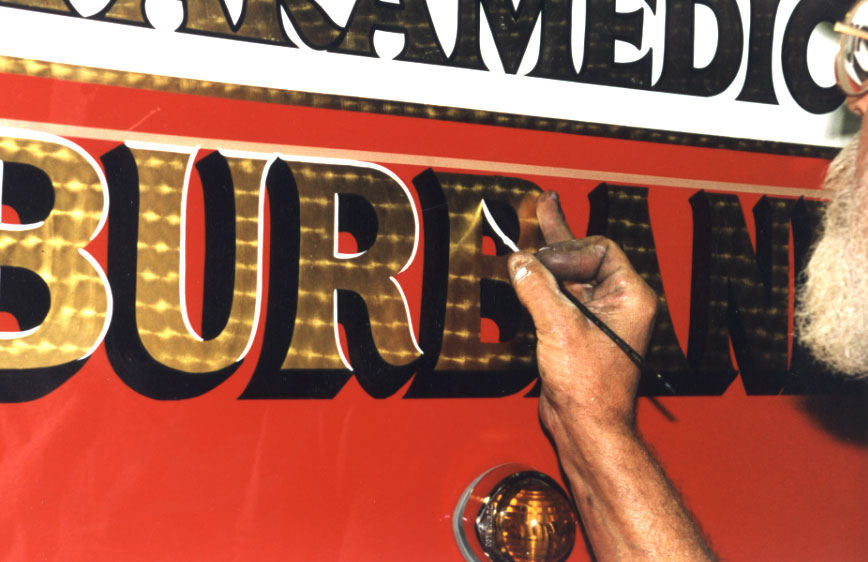
Photo 8: When I'm freehand striping I always place a piece of masking tape next to the gold leaf stripe and hold onto it's edge to keep my lines straight and non-wavering. Also, music always helps.
|
Photo 9: Here's a close-up shot showing you how the City of Burbank shows pride in their Fire Deptartments Equipment. Not too fancy, just enough style to be different. OH yea, finally give the gold leafed areas a final coat of clear, wax often and reclear every couple of years to keep the gold preserved for years to come.
|